

Posted on Aug 26, 2025 | Backend
URL Shortener Project (Express & JSON)
Hey Devs!
Ready to build your first real-world backend service? Now that you have a feel for Node.js and Express, let's create something tangible: a URL Shortener API. This project is a classic for a reason- it's small, easy to understand, and covers essential concepts like handling POST requests and managing data.
| Table of Contents |
|---|
| Reference Materials |
| Overview of the Project |
| Setting Up Your Project |
| Using a JSON File as a Database |
| Building the Express Server |
| Creating the API Endpoints |
| Testing Your API |
| Installing Thunder Client for testing |
| Conclusion |
Reference Materials.
This section is only provided for reference only. You can refer to the following mentioned blogs if you need deep explanations or a revision over some topics.
Introduction
A URL shortener is a service that takes a long web address (like
https://www.google.com/search?q=backend+development+projects) and converts it into a short, easy-to-share link (likehttp://short.url/AbC12). Today, you'll build the engine behind this service. It's a fantastic way to understand how data flows in a web application and how different parts of an API work together.
What is a URL Shortener API?
Our API will be a microservice with two main jobs:
-
Shorten a URL: It will receive a long URL, generate a unique short code for it, save the pair, and send back the new short URL.
-
Redirect to the Original URL: When someone visits the short URL, our service will look up the original long URL and automatically redirect them to it.
For this guide, we'll store our URLs in a JSON file to act as a simple database. This makes our data persistent, meaning it won't be lost when the server stops.
Prerequisites
Before you begin, make sure you have:
- Node.js and npm installed: You should be comfortable with basic npm commands.
- A code editor like Visual Studio Code (VS Code).
- An API testing tool like Thunder Client (a VS Code extension),Postman or comfort using cURL in your terminal.
We will use cURL and Thunder Client for testing here.
Step 1: Setting Up Your Project
First, let's get the basic structure in place.
A. Create a project folder:
Open your terminal and create a new directory for your API.
mkdir url-shortener-api
cd url-shortener-api
B. Initialize the project with npm:
This creates our package.json file to manage dependencies.
npm init -y
C. Install dependencies:
We need express for the server and a package called nanoid to generate our unique short IDs.
npm install express nanoid
Step 2: Create the Database File
Inside your url-shortener-api folder, create a new file named database.json.
Add an empty JSON object to it. This initializes our database.
{}
Step 3: Building the Express Server with File Persistence
Let's write the core server code, now with the ability to read from and write to our JSON file.
Open (or create) index.js and add the following code step by step.
(For best practice first read the headings and think yourself of what to write and test it).
1. Import Dependencies
// 1. Import dependencies

const express = require('express');
const { nanoid } = require('nanoid');
const fs = require('fs'); // Import the File System module
2. Create an Express app and define constants
// 2. Create an Express app and define constants
const app = express();
const port = 3001;
const DB_FILE = './database.json'; // Relative path to our database.json file
3. Add middleware to parse JSON request bodies
// 3. Add middleware to parse JSON request bodies
app.use(express.json());
4. Load data from the JSON file on startup
// 4. Load data from the JSON file on startup
let urlDatabase = {};
try {
  const data = fs.readFileSync(DB_FILE, 'utf8');
  urlDatabase = JSON.parse(data);
} catch (err) {
  console.log('No database file found. A new one will be created on the first request.');
}
5. Basic route to confirm the server is running
// 5. Basic route to confirm the server is running
app.get('/', (req, res) => {
  res.send('Welcome to the URL Shortener API!');
});
6. Starting the server
// 6. Start the server
app.listen(port, () => {
  console.log(`Server running at http://localhost:${port}/`);
});
Explanation of New Parts:
-
const fs = require('fs');imports Node.js's built-in File System module, which lets us interact with files on our computer. -
const DB_FILE = './database.json';defines a constant for our database file path, making the code cleaner. -
The
try...catchblock is for loading the data.-
fs.readFileSync(DB_FILE, 'utf8')synchronously reads the entire content of ourdatabase.jsonfile. -
JSON.parse(data)converts the text content from the file into a JavaScript object that we can work with. -
If the file doesn't exist yet, the
catchblock will log a message and theurlDatabasewill remain an empty object.
-
Verify if your server is running properly by starting it with the command
node index.jsand going to the url in your browser. If you see "Welcome to the URL Shortener API!" then everything is properly setup.
Step 4: Creating the API Endpoints
Now we'll update the real logic to save any new URLs to our database.json file and giving a short-url in response..
Add the following code to index.js before app.listen()
Make sure app.listen() is at the last of the file.
- Adding a POST route for sending the URL in JSON.
// ... (keep the existing code from above)

// Endpoint to shorten a URL
app.post('/shorten', (req, res) => {
  // We will implement logic here later.
});
app.get('/:shortId', (req, res) => {
  // We will implement logic here later.
});

// (keep the app.listen part below)
- The
/shortenroute will handle the POST request. We will send a JSON body with the fieldlongUrland it will convert the longUrl into a simple shortUrl.- It will use the
nanoidpackage to generate 7 digit unique Id. - That Id will be saved with the longUrl to the database.json.
- It will use the
- The
/:shortIdis a get route that will get the url associated with the short Id and will redirect to the original website.- It will read the database and match the URL.
- It will redirect the User to the associated long URL.
Step 5: Writing URL Shortening Logic
- Inside your
app.post('/shorten', (req,res)=> {});Add the following code.
const { longUrl } = req.body; //Extracting longUrl field from the body.

  //Checking if field is present in the request body.
  if (!longUrl) {
    return res.status(400).json({ error: 'longUrl is required' });
  }

  //using nanoid to generate a 7 character Id.
  const shortId = nanoid(7);

  //Assigining the shortId the longURL
  urlDatabase[shortId] = longUrl;

  // Saving the shortId and the URL to the database.json file
  try {
    // Convert the JS object back to a JSON string and write it to the file
    fs.writeFileSync(DB_FILE, JSON.stringify(urlDatabase, null, 2));
  } catch (err) {
    console.error('Failed to save to database:', err);
    return res.status(500).json({ error: 'Internal Server Error' });
  }

  // Creating a shortUrl with the shortId
  const shortUrl = `http://localhost:${port}/${shortId}`;
  res.status(201).json({ shortUrl });
Explanation of Code:
-
POST /shorten:-
After adding the new URL to the
urlDatabaseobject, we have a newtry...catchblock. -
JSON.stringify(urlDatabase, null, 2)converts our JavaScript object back into a nicely formatted JSON string. -
fs.writeFileSync(...)synchronously writes this string to ourdatabase.jsonfile, overwriting the old content with the new, updated data. -
If writing to the file fails, we send a
500 Internal Server Errorresponse.
-
Step 6: Writing URL Redirecting Logic
// Endpoint to redirect to the original URL
app.get('/:shortId', (req, res) => {
  // Getting the shortId from the params.
  const { shortId } = req.params;
  // Finding longUrl in the JSON database.
  const longUrl = urlDatabase[shortId];

  if (longUrl) {
    res.redirect(longUrl);
  } else {
    res.status(404).send('URL not found');
  }
});

// ... (keep the app.listen part at the bottom)
Explanation of Code:
-
GET /:shortId:-
Extracting the
shortIdfrom the URL in the GET request. -
Searching for the URL in the database and redirecting to it if found successfully.
-
If the URL is not found for the entered Id, we send a
404server error with aURL not foundresponse.
-
Step 7: Testing Your API
Now that your code is in written, it's time to test the two endpoints to make sure everything works as expected.
Don't forget to start your server first by running node index.js in your terminal.
A. Testing the /shorten Endpoint (POST Request)
This endpoint takes a long URL and returns a short one. We need to send a POST request with a JSON body.
Using cURL (in your terminal)
-
Open a new terminal window (leave your server running in the other one).
-
Run the following command. This sends a
POSTrequest with a JSON payload to your/shortenendpoint.
    curl -X POST \
      -H "Content-Type: application/json" \
      -d '{"longUrl": "https://www.ujjwalit.co.in/home"}' \
      http://localhost:3001/shorten
- Expected Output: You should get a JSON response back with a
201 Createdstatus. TheshortUrlwill contain a unique 7-character ID.
    {
      "shortUrl": "http://localhost:3001/ujtech1"
    }
(Note: Your short ID will be different and randomly generated.)
Using Thunder Client (or Postman)
If using cURL are complex too you you can use tools like Thunder Client (VS Code extension) or Postman to send the POST request to your servers.
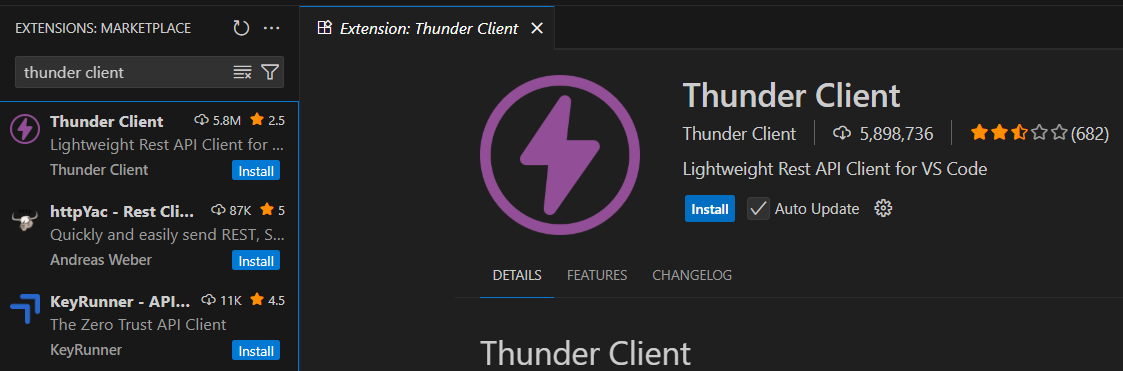
To install Thunder Client
go to Extensions in VS Code -> Thunder Client -> Install
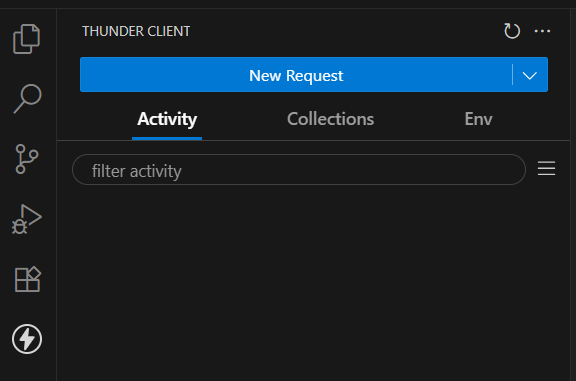
-
Open Thunder Client in VS Code and click New Request.
-
Set the request method to POST.
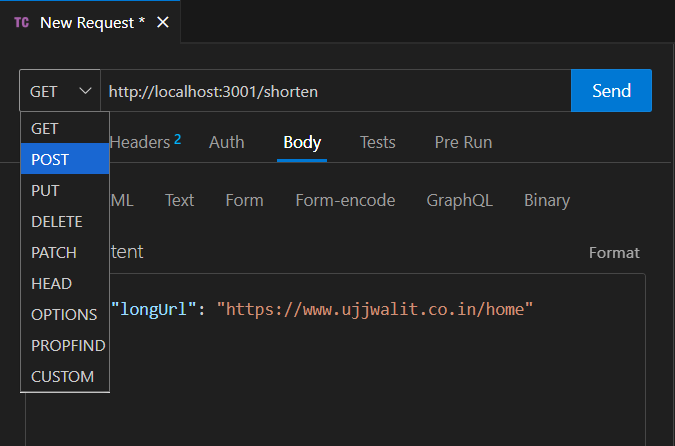
-
Enter the URL:
http://localhost:3001/shorten. -
Go to the Body tab and select the JSON sub-tab.
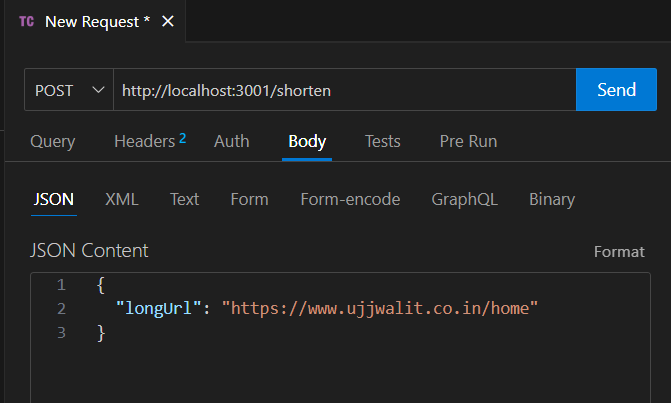
-
In the text area, enter the following JSON object:
JSON
{ "longUrl": "https://www.ujjwalit.co.in/home" } -
Click the Send button.
-
You should see the JSON response in the results panel with a
201 Createdstatus code.
Verification: After this step, open your database.json file. You should see the new entry, confirming that data was saved!
{
  "ujtech1": "https://www.ujjwalit.co.in/home"
}
B. Testing the Redirect Endpoint (GET /:shortId)
This endpoint takes the short ID from the URL and redirects the user to the corresponding long URL.
Using a Web Browser (Easiest Method)
-
Take the
shortUrlyou received from the previous test (e.g., `http://localhost:3001/ujtech1). -
Paste it directly into your web browser's address bar and press Enter.
-
Expected Result: You should be instantly redirected to the original long URL (
https://www.ujjwalit.co.in/home).
Using cURL (to see the headers)
Using cURL with the -v (verbose) flag is a great way to see the redirect happening behind the scenes.
- In your terminal, run the following command, replacing
aB1cD2ewith the short ID you received.
curl -v http://localhost:3001/ujtech1
-
Expected Output: The verbose output will show you the HTTP headers. Look for these two lines, which confirm the redirect is working correctly:
-
< HTTP/1.1 302 Found(The redirect status code) -
< Location: https://www.ujjwalit.co.in/home(The destination URL)
-
If both tests work, your URL shortener API is fully functional!
Conclusion
Congratulations! You've just completed your URL Shortener API to have persistent data storage using a simple JSON file. You learned how to use the fs module to read and write files, making your application much more robust and useful. This is a fundamental skill in backend development and a great step towards building more complex applications.
Have fun coding with Express!
Enjoy the content here?
Sign up on our platform or join our WhatsApp channel here to get more hands-on guides like this, delivered regularly.
See you in the next blog. Until then, keep practicing and happy learning!
3 Reactions
0 Bookmarks